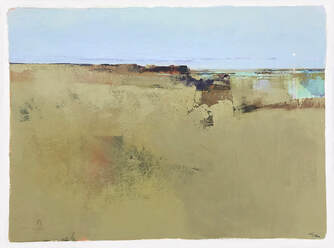
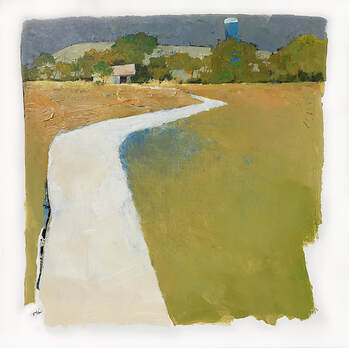
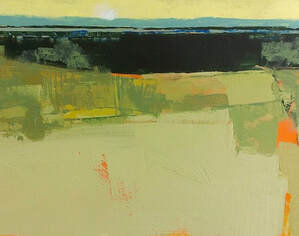
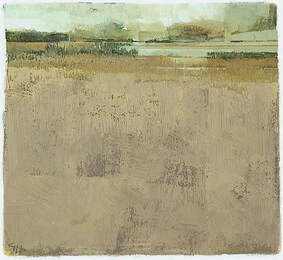
We are beyond excited to have Greg teaching for us again!
MAXIMUM OF 12 ARTISTS PER SESSION
Short sessions over multiple days to allow for painting time
Includes helpful critques
One Day Silversmith Workshop - Gem Of A Ring Workshop
Playfully elegant sums up this beautiful sterling silver ring. This is the perfect project to refine one's soldering, sawing and setting skills.
You'll begin by prepping the bezel setting a round or oval cabochon of choice. From here, you will move on to learning how to size and cut out stunning designs of your choice on your ring band. Nice clean solder joints for the frame work that supports the stone and the opening on the channnel on the top of this ring will make for a stunning focal point. Once the band has been designed, sawn out, soldered and shaped, you will solder your bezel then set your stone. Then it's all about the clean up. This is what seperates a good piece from a great piece. Go for a nice high shine polish or oxidized finish. There will be a large selection of natural stones to choose from.
Note: You may make your ring narrower if desired.
Lots of options between these three rings, will leave students wanting to create a multitude of variations. You will have an option of using either cubic zirconia and or natural stones.
Prong Set Baguette Ring- will work on our setting skills and how to adapt a project into becoming part of the setting. This sleek low profile ring is stunning on its own or nestled into a stack of rings. Students will also get a bit more comfortable when setting those tricky geometric corners!
Tension Set Ring- this ring band is made with a heavy gauge sterling silver round wire. The instructor will demonstrate how to work harden the wire to create enough tension to securely hold out 3mm stone.
Faux Braid Ring- keeping things simple, this is the perfect accompaniment to either of the rings described above. It is simple and yet adds a design element when stacked with the clean look of the other rings.
Beautiful Baguette Prong Set Ring
Along With A Second Ring Of Choice
Wow. Who wouldn't want a baguette stacking ring on their hand? No one! This ring is so cool looking! Sleek with a punch of colour. This Baguette Flush set Ring is the perfect sample for learning how to set a rectangle faceted stone safely.
And you can combine it with your choice of one of the other two rings pictured. Either the faux "braided" or tension set ring. Each of them is spectacular together or on their own.
Chandelier Earrings or Pendant
Playful, dangly earrings, designed to sparkle. Movement and the play of colours through mixed metals is the theme of this project!
You will have the option to make a pair of earrings or a pendant. And if time permits, you will be able to make both.
Starting with narrow strips of brass, bronze, copper and sterling silver, that will be sawn to various lengths, You will get to play with how they graduate in length, how they stagger along with how the colours lay against one another. Keep the surface flat or texured. You also have the option to make them using all sterling silver if you prefer.
Once the pieces have been decided on, the instructor will guide you on how best to string them together so they sit comfortably balanced while still allowing for flirty movement.
Once all the segments have been fabricated and polished, you will begin attaching them to a secondary square bar that is soldered to the ear wire. This project is great for fine tuning soldering skills, especially in tight places!
Innovative and creative; this ring has boundless possiblities.
You will start by creating your own sterling silver foldformed "cabochon". Students will use an assortment of hammers, punches and foldforming techniques to create a one-of-a-kind textured sterling piece and will fabricate a sterling silver "cabochon" to your desired size.
From here, you will build a bezel for your Foldformed cabochon that will be secured in a thick sterling bezel that you will learn to tab set with 4 tabs. It will then get soldered onto a heavy half round Sterling Silver band. The band will be custom fit to the wearer in a style that will keep it more comfortably.centered on the top of your finger!
You will have the option of finishing your rings off with a high shine polish or blackening it to enhance the textures within the foldformed Cabochon.
1 Day Workshop: Monday October 2.
$165.00 + gst.
material fee of $50.00 paid to Kelly upon commencement.
OR
1 Day Workshop: Monday October 16
$165.00 + gst
material fee of $50.00 paid to Kelly upon commencement.
Email me to save your spot! [email protected]
$165.00 + gst.
material fee of $50.00 paid to Kelly upon commencement.
OR
1 Day Workshop: Monday October 16
$165.00 + gst
material fee of $50.00 paid to Kelly upon commencement.
Email me to save your spot! [email protected]
More 2023 Workshops Announced soon!
Silversmith Jewelry Workshop
Save the dates! - Projects announced soon.
Nanaimo, BC
|
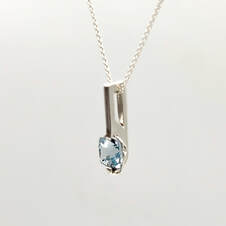
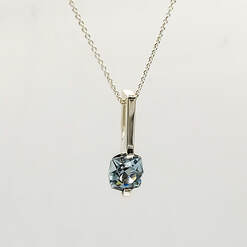
Single Stone Drop Pendant
This unique setting will open doors for anyone wanting to up their stone setting skills. You will fabricate this setting from two pieces of sterling silver sheet metal. The first will act as the base to your setting while cleverly doubling as the bail for your pendant. This piece will be cut out and will become the frame work for your setting. |
|
The second section of sterling silver will be formed into the actual setting for your stone and helps secure it. There will be fine sawing and filing skills put to use on this project. Kelly will demonstrate a couple of ways to polish into the tight spaces in your cut outs.
Jewelry fabrication is all about the creative details and this piece embodies that sentiment to a T. You will have the opportunity to choose from a wide range of eye catching round or oval natural faceted stones. Elegant describes this piece. |
|
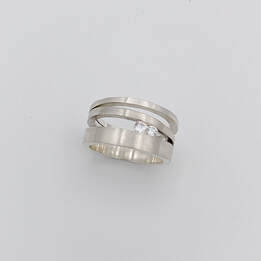
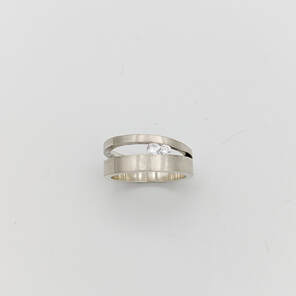
Sleek Channel Set Ring
Sleek and sophisticated, this ring looks simple but will present its own set of challenges. We will start by fabricating 2 bands and learn how to partially solder them together. Precision is the secret to this ring. You will focus on the subtle details to ensure a stunning end product. Once the bands are assembled Kelly will demonstrate two options on finishing: how to achieve a super high polish or how to use a diamond bur to add texture for the final look. |
|
Next you will learn the skills required to channel set two graduated sizes of cubic zirconias snugly into the space of your rings. This will take some finessing. This ring is the perfect intro to channel setting. It provides flexibility in the process of stone setting so that everyone can return home knowing how to repeat this unique setting. And in addition you get to wear one of these beauties home on your finger. Time permitting for our more advanced students only, a third band and/or an extra stone or two may be added. |
|
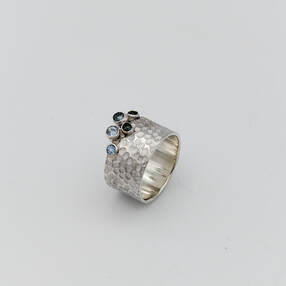
Textured ring with dazzle
A number of techniques are involved in the making of this gorgeous ring. ring that focuses on multiple tube sets that are grouped together and set on edge. You'll begin by learning to construct the ring shank and create the playful bubble looking ball texture. There are a couple of approaches that can be used to achieve this look and Kelly will demonstrate both. Next, you'll learn how to properly attach the multiple tube settings onto the edge of your ring band while learning some handy tips and tricks to achieving this balancing act when it comes time to solder. |
|
Kelly will also demonstrate two ways to prevent your settings from joining accidentally when they are being soldered to your shank. You may tube set up to 5 natural stones in the colors of your choosing from the selection Kelly will provide. ****Additional stones and bezels may be purchased for your ring if your skill level is advanced. This ring looks great with just five though! |
|
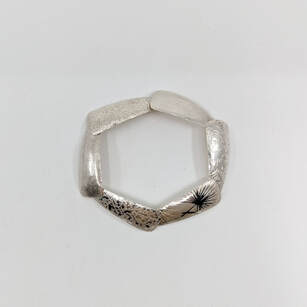
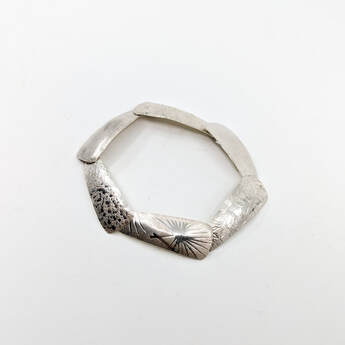
Link by Link Bracelet
This fun, eye catching bracelet will focus on playing with rolling mill and hammer textures. Along with texturing, students will be form their long silver bracelet segments to add a bit more dimension to their pieces. Once all the segments have been fabricated you'll link them together invisibly! Such a pretty look! You will also create a secure hook closure that won't detract from the sleek style of this bracelet and it's beautifully patterned links. |
|
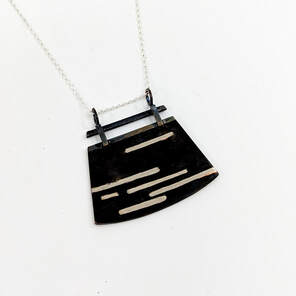
Marvels of Inlay - Pendant or Earrings
Inlay is a technique that has been around for centuries and can be accomplished utilizing many different types of materials. Our project will focus on mixing metals in a fun and unique way. Once you have designed your shape in copper, you will then solder sterling silver to the back of your piece. This will prevent any copper from. coming into contact with your skin. Next, learn the skills to inlay your fine silver design without the need for solder. Kelly will demonstrate a couple of different approaches to accomplish a well-fitted metal inlay. You will have the opportunity to design your own pieces and patterns for your inlay. |
This style is open to many possibilities and patterns with minimal difficultly. The play of colour in the metals allows for an interesting design that can stand beautifully on its own. Especially if one metal is oxidized black, leaving the secondary metal to stand out more boldly against a darker background. Fine silver does not oxidize which is ideal for this project.
Or you may also choose to flame patina your copper which would result in creating striking bursts of color. As always, the choice of finish is yours to make.
Or you may also choose to flame patina your copper which would result in creating striking bursts of color. As always, the choice of finish is yours to make.
Visit Kelly's website: www.kellyallanson.com
All tools provided for use during our workshops!
5 days
Projects can be simplified or made more challenging depending on experience.
Beginners will make the simpler versions of each project.
APRIL 20 - 24, 2023. Session 1 Thursday - Monday (1 space available)
APRIL 27- May 1, 2023 Session 2 Thursday - Monday (Sorry Full)
$745.00 Plus get 5 %
NOTE: + $250.00 material fee to be paid to instructor upon commencement.
Prefer a payment plan? Email me here: [email protected]
Hours: 10 - 5 daily
Location: 1520 Stewart Ave. Nanaimo, BC
Payment methods:
PayPal or Credit Card via PayPal Use this option for Canadian or USA payments + 4% handling fee.
Interac e-Transfer Canadian residents only
PayPal or Credit Card via PayPal Use this option for Canadian or USA payments + 4% handling fee.
Interac e-Transfer Canadian residents only
|
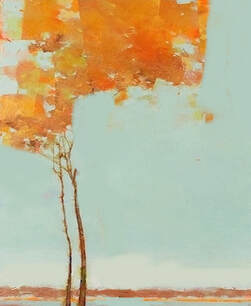
Join us for this fun, paint-filled week and learn Greg’s unique approach to intuitive landscape painting.
No matter what level of abstraction you prefer, recognizable subject matter or pure abstraction, this workshop has been designed to help you find your way. Greg will share with you the fundamental foundations of all his paintings, his four key pillars of success: Composition, Colour, Texture and Stroke. |
|
You’ll use unconventional painting tools and will begin to view each of them as an opportunity. Think paint scrapers, palette knife and even cardboard. A limited palette and minimal supply list also helps make for success.. And Greg primarily uses the very inexpensive acrylic tube paint brands! Not that you can tell! It is exhilarating to let go of control and learn to respond to your mark making, letting the paint lead the way. |
|
While always looking to nature as our inspiration, we’ll be making it all up in this workshop. No reference images needed! We won't be looking to the old masters, or hitting the books but will instead begin to flex our intuition muscle, learn to trust our feelings and allow them to guide our decisions. |
|
Greg will present inspiring demonstrations along with a few invaluable step-by-step power-point presentations of his process from beginning through completion. You'll see his completed paintings along with the stages each one of them went through. Greg will explain each technique he used and why. Such a valuable learning tool! Throughout the week, you’ll be given a few assignments to help keep you focused along with tons of painting time. There'll be lots of one-on-one time with Greg along with a constructive critique or two sprinkled in. |
|
We will keep the substrate size on the small to medium size. This will allow more opportunities for you to practice. Greg will complete a few paintings during the workshop (more if time permits) and will also demonstrate many more techniques for you to add to your tool box.
Greg holds nothing back and with his guidance and your hands-on practice you’ll learn how to incorporate all four of Greg's key pillars of success into your own work too! By the end of the week, you will have discovered the delight in painting and experienced the true joy of creating!
As Greg likes to put it: You'll be painting for the sheer fun of it! |
Be sure to read faq's here
Visit Greg's Etsy shop: HargreavesArt
Max: 14 Only
Session 1 5 Days
Session 2 5 Days
Hours: 10 - 4:30 daily 30 - 45 minutes for lunch
Easels: NO You'll paint on your table top.
Level: Students should have basic knowledge of acrylic paints and be familiar with basic color theory
Medium: Acrylic (no oils) Quick drying times are required.
Tuition: TBA
Location: 1520 Stewart Avenue, Nanaimo, BC (Near Departure Bay ferries)
NEW DATES COMING SOON!
ABSTRACTING THE LANDSCAPE: NATURE RE-IMAGINED
Nanaimo, BC
Nanaimo, BC
Join us for this fabulous intuitive
painting workshop so you too can paint gorgeous abstract landscapes!
You'll also experience what it feels like
to paint happy!
painting workshop so you too can paint gorgeous abstract landscapes!
You'll also experience what it feels like
to paint happy!
ABSTRACTING THE LANDSCAPE: NATURE RE-IMAGINED
Click to set custom HTML
SILVERSMITH INTENSIVE WITH KELLY ALLANSON
5 DAYS - 5 AMAZING PROJECTS
SESSION 1 3 days September TBA
SESSION 2 3 days September TBA
This fabulous week-long Jewellery Intensive Workshop was designed specifically to teach you essential jewellery fabrication methods with each project chosen for its beauty and scope of techniques.
No other workshop or class out there comes close to matching the number of techniques you'll learn and the awesome finished pieces you'll go home with! Perfect for all skill levels as projects will be adapted to meet individual needs.
No other workshop or class out there comes close to matching the number of techniques you'll learn and the awesome finished pieces you'll go home with! Perfect for all skill levels as projects will be adapted to meet individual needs.
|
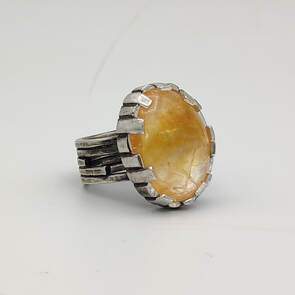
CHUNKY CASTELLATED BEZEL RING Take your bezel setting to new heights! You will learn to fabricate a unique castellated bezel for a large cabochon gemstone of choice. (Kelly will have a variety to choose from. Think mid to large size, oval, round or freeform. Components are handcrafted from thick sterling silver sheet. Design your bezel cuts with random heights or keep them uniform, they are beautiful either way. You do you! |
|
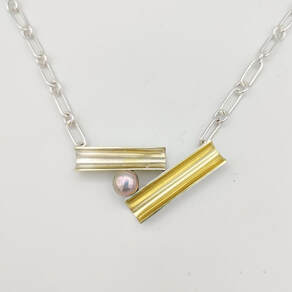
ASYMMETRICAL FORMED PENDANT & THE TRENDING PAPERCLIP CHAIN Embracing the lines is the key to this beauty. You will begin by choosing a mix of sterling silver, copper, brass and bronze for the body of your piece. Next, we'll bond them together, cut to size and hammer into shape to create long tubular channels. You will accomplish this using forming blocks and mallets. To spice it up, you can opt to add texture with punches, hammers and or drilling holes which makes each one that much more unique. |
Once shaped, you'll strategically solder them together and learn how to best set a fresh water half-drilled pearl in a secure and safe manner. There will be a variety of pearls and colors to choose from.
Lastly, you will fabricate the trendiest chain of 2022, the Paperclip! Learn how best to attach your chain to your pendant for a balanced and beautiful piece. Connect your chain links with jump rings or without.
Lastly, you will fabricate the trendiest chain of 2022, the Paperclip! Learn how best to attach your chain to your pendant for a balanced and beautiful piece. Connect your chain links with jump rings or without.
|
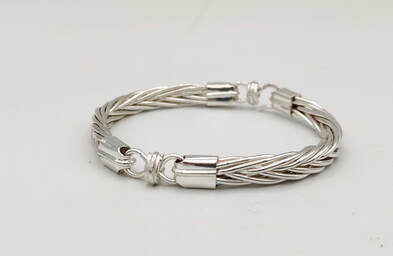
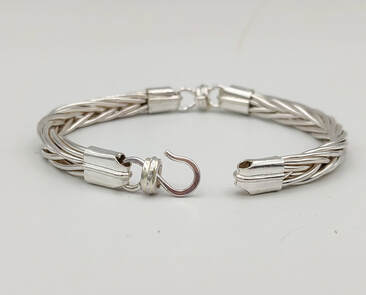
BRAIDED & SECTIONED BRACELET For something completely new, Kelly will teach you how to weave two sections for your bracelet. Doubling the exercise ensures you will have the techniques mastered as it is a little tricker than it looks. It's like magic watching the weave transform as you hammer down the sterling silver wires into a gorgeous braid. |
|
You will move onto fabricating all of your end caps, links and closure to finish your bracelet. Some fine soldering skills will be required and or attained for this project! This project is reminiscent of Viking knit but with a completely different approach and is much more durable. Once learned you won't want to stop making these which is a good thing because everyone will want one! |
|
LEAF SAWN CAPTURED STONE RING WITH ROLLED & FILED SHANK DESGIN
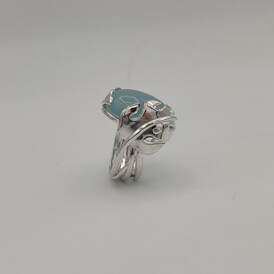
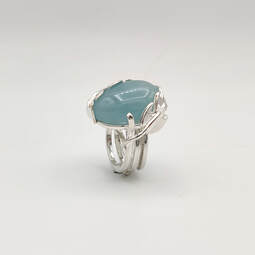
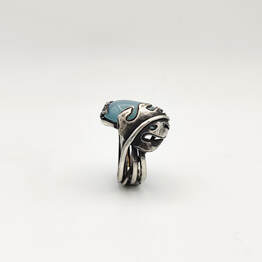
Pulling your inspiration from nature, this ring brings an organic component to your metal that otherwise can be difficult to attain. You'll begin by manipulating your wire into a tapered free-flowing, vine inspired ring band utilizing a hammer, files and rolling mill. (Kelly will also explain how to replicate this at home without the use of a mill.) |
|
From here you will design and saw your organic monstera leaf design or any leaf shape of your choosing out of sterling silver plate. These stunning little leaves will wrap around and slightly over your stone capturing it in place. Next you'll start piecing all of your components together. The ring is built one step at a time and by utilizing small increments of pinching and soldering, the metal will soon begin to secure your cabochon into place. |
|
FABULOUS FILIGREE EARRINGS WITH STONES SET FROM BEHIND (Or Pendants)
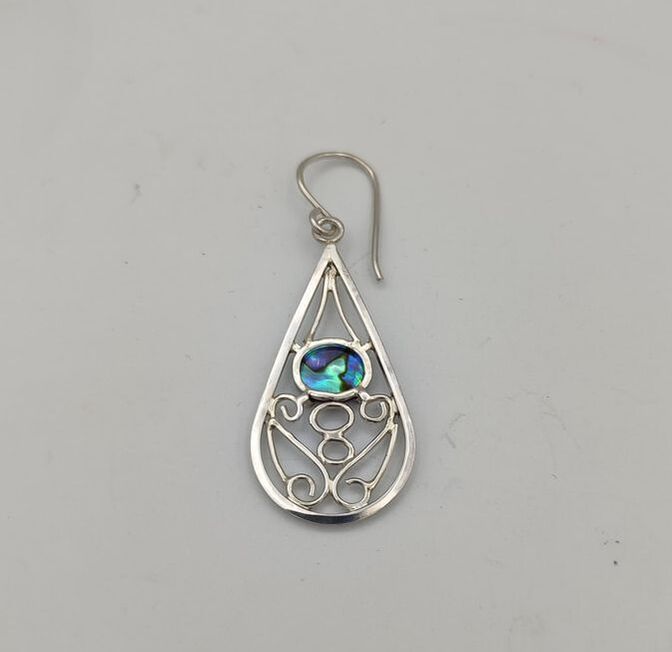
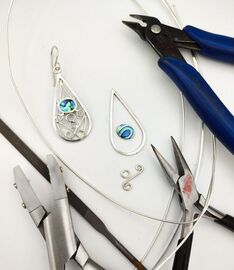
You will design and construct your earring frames in the shape of your choosing utilizing the materials supplied. You may can roll down your wire in keeping with the more traditional filigree style of fabrication or opt for a bit more of a contemporary look. You will design your own delicate pattern pieces for inside your frame ensuring that each students work is truly unique! |
|
Kelly will demonstrate two ways to assemble your filigree pieces, either by soldering for the less experienced student or by fusing of the fine silver for the more advanced. You will also learn a fun and clever way to set a stone or beautiful abalone shell from behind. Kelly will have a variety to choose from. In the end you will have a gorgeous pair or earrings or pendants. Lastly, you will make quick ear wires for earrings or jump rings for bails. |


